
建站参考
建站参考
今舍弃 hexo 的博客,改为使用 vuepress。 具体使用 vuepress-theme-hope 版本。
官方教程
vuepress-theme-hope:https://vuepress-theme-hope.github.io/v2/zh/guide/
vuepress 2:https://v2.vuepress.vuejs.org/
安装
yarn create vuepress-theme-hope my-blog本地启动
yarn docs:dev项目打包
yarn docs:build打包完可以在src\.vuepress 看到文件夹 dist。
更新到仓库
使用 shell 脚本将打包后的文件(src.vuepress\dist文件夹下的文件)更新到 Gitee仓库。(此脚本包含打包,以后修改完不用再手动打包了)
#!/usr/bin/env sh

# 确保脚本抛出遇到的错误
set -e
# 生成静态文件
yarn docs:build

#上传
# git add -A
# git commit -m '上传'
# git push origin master


# 进入生成的文件夹
cd src/.vuepress/dist

# 如果是发布到自定义域名
# echo 'www.example.com' > CNAME

git init
git add -A
git commit -m 'deploy'
git remote add gitee https://gitee.com/...

git push  --force gitee master

cd -

echo 按任意键继续
read -n 1
echo 继续运行
备份: 在 github 仓库备份原文档。
部署
宝塔下运行
环境:Ubuntu 22.04
安装宝塔:https://www.bt.cn/new/index.html
宝塔上安装:
- Nginx/Apache(根据个人需求任意安装一个,用于反向代理做域名绑定或80端口访问使用)
- Node.js
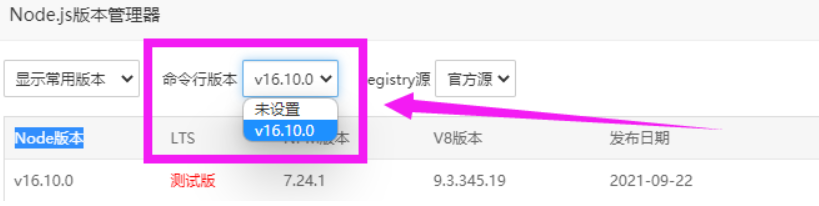
- Node.js设置(很重要:命令运行版本默认状态是:未设置,这里我们需要选择一下版本,否则后面安装vuepress无法使用命令行模式。registy源默认使用 官方源 即可)
建站: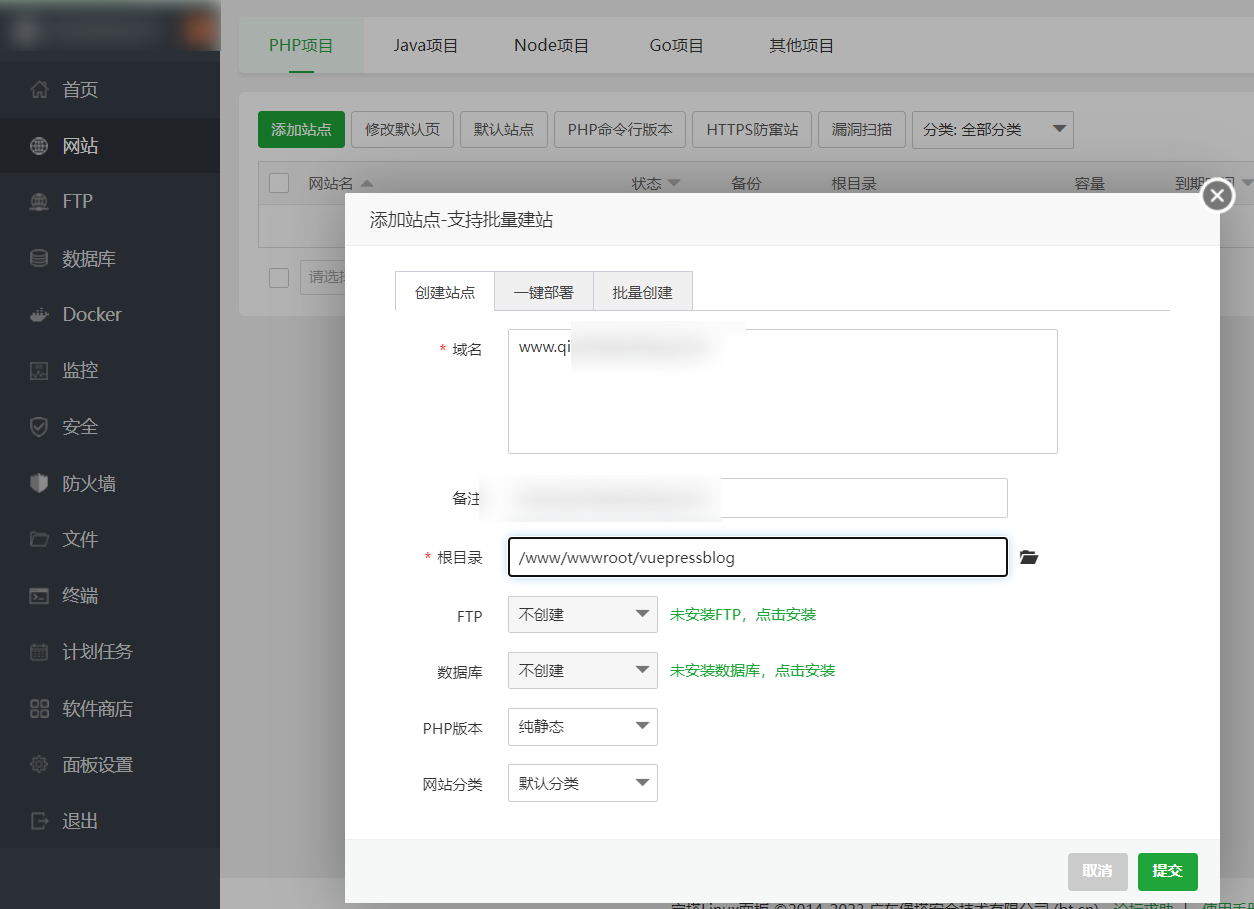
删除网站对应根目录(/www/wwwroot/vuepressblog)下所有文件,在/www/wwwroot/vuepressblog下右键打开终端,克隆gitee上的项目:
git clone https://gitee.com/...一些问题:
- 一切就绪后访问网站时:
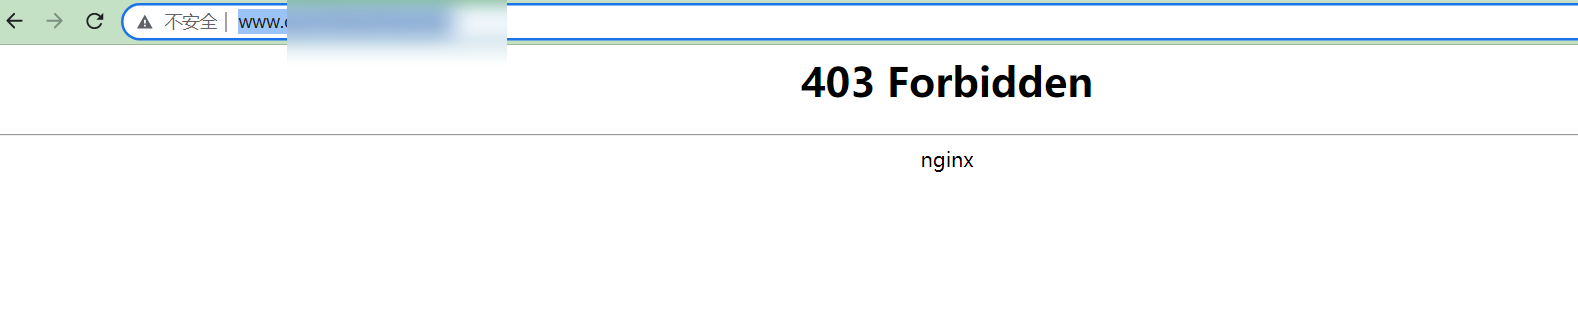
解决参考:https://www.bt.cn/bbs/forum.php?mod=viewthread&tid=72173&highlight=nginx%2B403
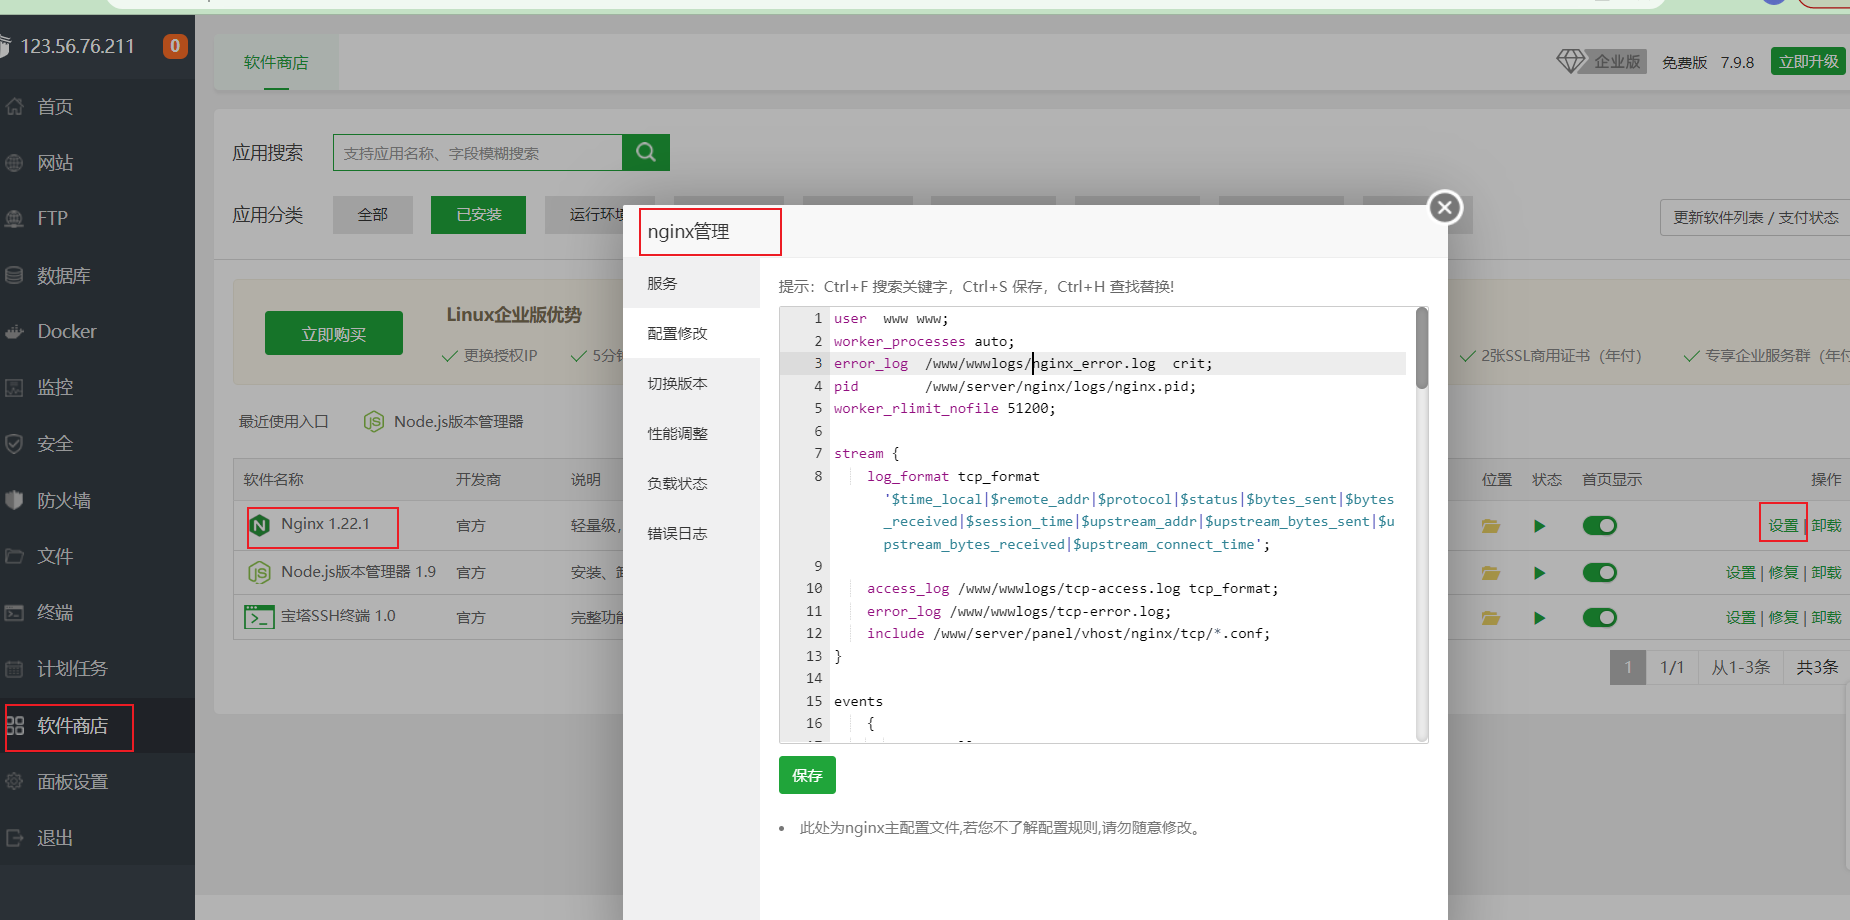
- 若想要nginx 配置位置:(此项目不需要)
webhook 设置
当你修改本地文件后,想要网站上的内容自动更新怎么办?
可以使用webhook。当gitee上有push操作时,宝塔自动执行脚本,从gitee上拉取最新的文件。
脚本:
cd /www/wwwroot/vuepressblog/vuepressblogdist;

#git pull 来从远程仓库拉取同步代码
## 注意宝塔好像无法识别&&后的指令,只执行了fetch,所以在宝塔上分开写
#git fetch --all && git reset --hard origin/master && git pull
git fetch --all;
git reset --hard origin/master;
git pull;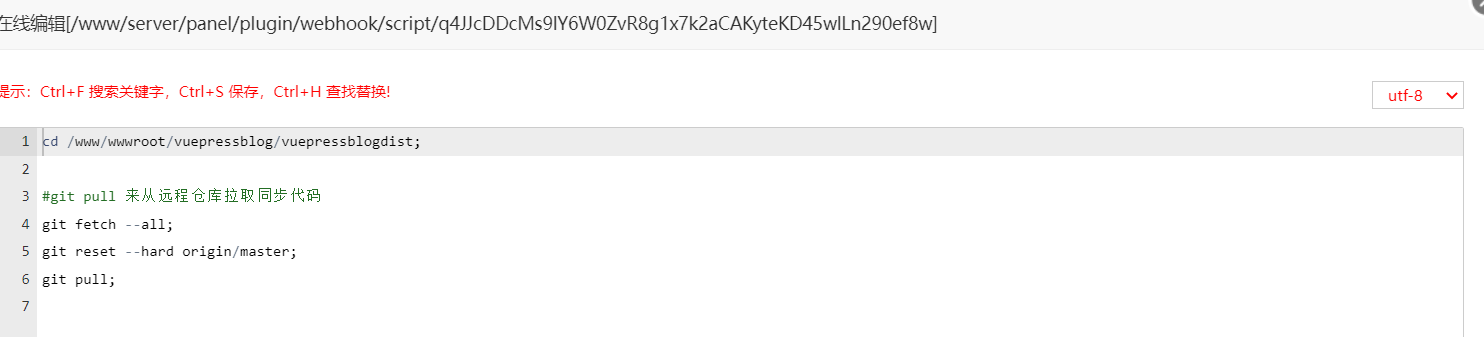
或
#!/bin/bash
echo ""
#输出当前时间
date --date='0 days ago' "+%Y-%m-%d %H:%M:%S"
echo "Start"
#判断宝塔WebHook参数是否存在
if [ ! -n "$1" ];
then
          echo "param参数错误"
          echo "End"
          exit
fi
#git项目路径
gitPath="/www/wwwroot/..."
#git 网址
gitHttp="https://gitee.com/..."

echo "Web站点路径:$gitPath"

#判断项目路径是否存在
if [ -d "$gitPath" ]; then
        cd $gitPath
        #判断是否存在git目录
        if [ ! -d ".git" ]; then
                echo "在该目录下克隆 git"
                git clone $gitHttp gittemp
                mv gittemp/.git .
               rm -rf gittemp
        fi
        #强制拉取最新的项目文件
        git fetch --all
        git reset --hard origin/master
        git pull origin master
        #设置目录权限
        chown -R www:www $gitPath
        echo "End"
        exit
else
        echo "该项目路径不存在"
        echo "End"
        exit
fi注意有时修改内容后重启宝塔才会生效:
# bt restart
然后再对gitee进行webhook配置。
配置阿里云DNS
保证网站从 github 拉取代码的网速,配置上了阿里云 DNS。
https://alidns.com/knowledge?type=SETTING_DOCS#user_linux
右侧目录
适用 vuepress2
链接:https://www.npmjs.com/package/vuepress-plugin-anchor-right
- 安装
yarn add -D vuepress-plugin-anchor-right指定目录版本:
yarn add -D vuepress-plugin-anchor-right@0.0.1-beta.7- 引入
// docs/.vuepress/config.js
const vuepressPluginAnchorRight = require ('vuepress-plugin-anchor-right') ;

module.exports = {
  ...,
  plugins: [
    [vuepressPluginAnchorRight()],
  ]
};
或
// docs/.vuepress/config.ts
import vuepressPluginAnchorRight from 'vuepress-plugin-anchor-right';

export default {
  ...,
  plugins: [
    [vuepressPluginAnchorRight()],
  ],
};
卸载目录:
yarn remove vuepress-plugin-anchor-right适用 vuepress-theme-hope
分析
当我使用小屏笔记本的时候,发现文章目录都在左侧,显得很臃肿。就像下面:
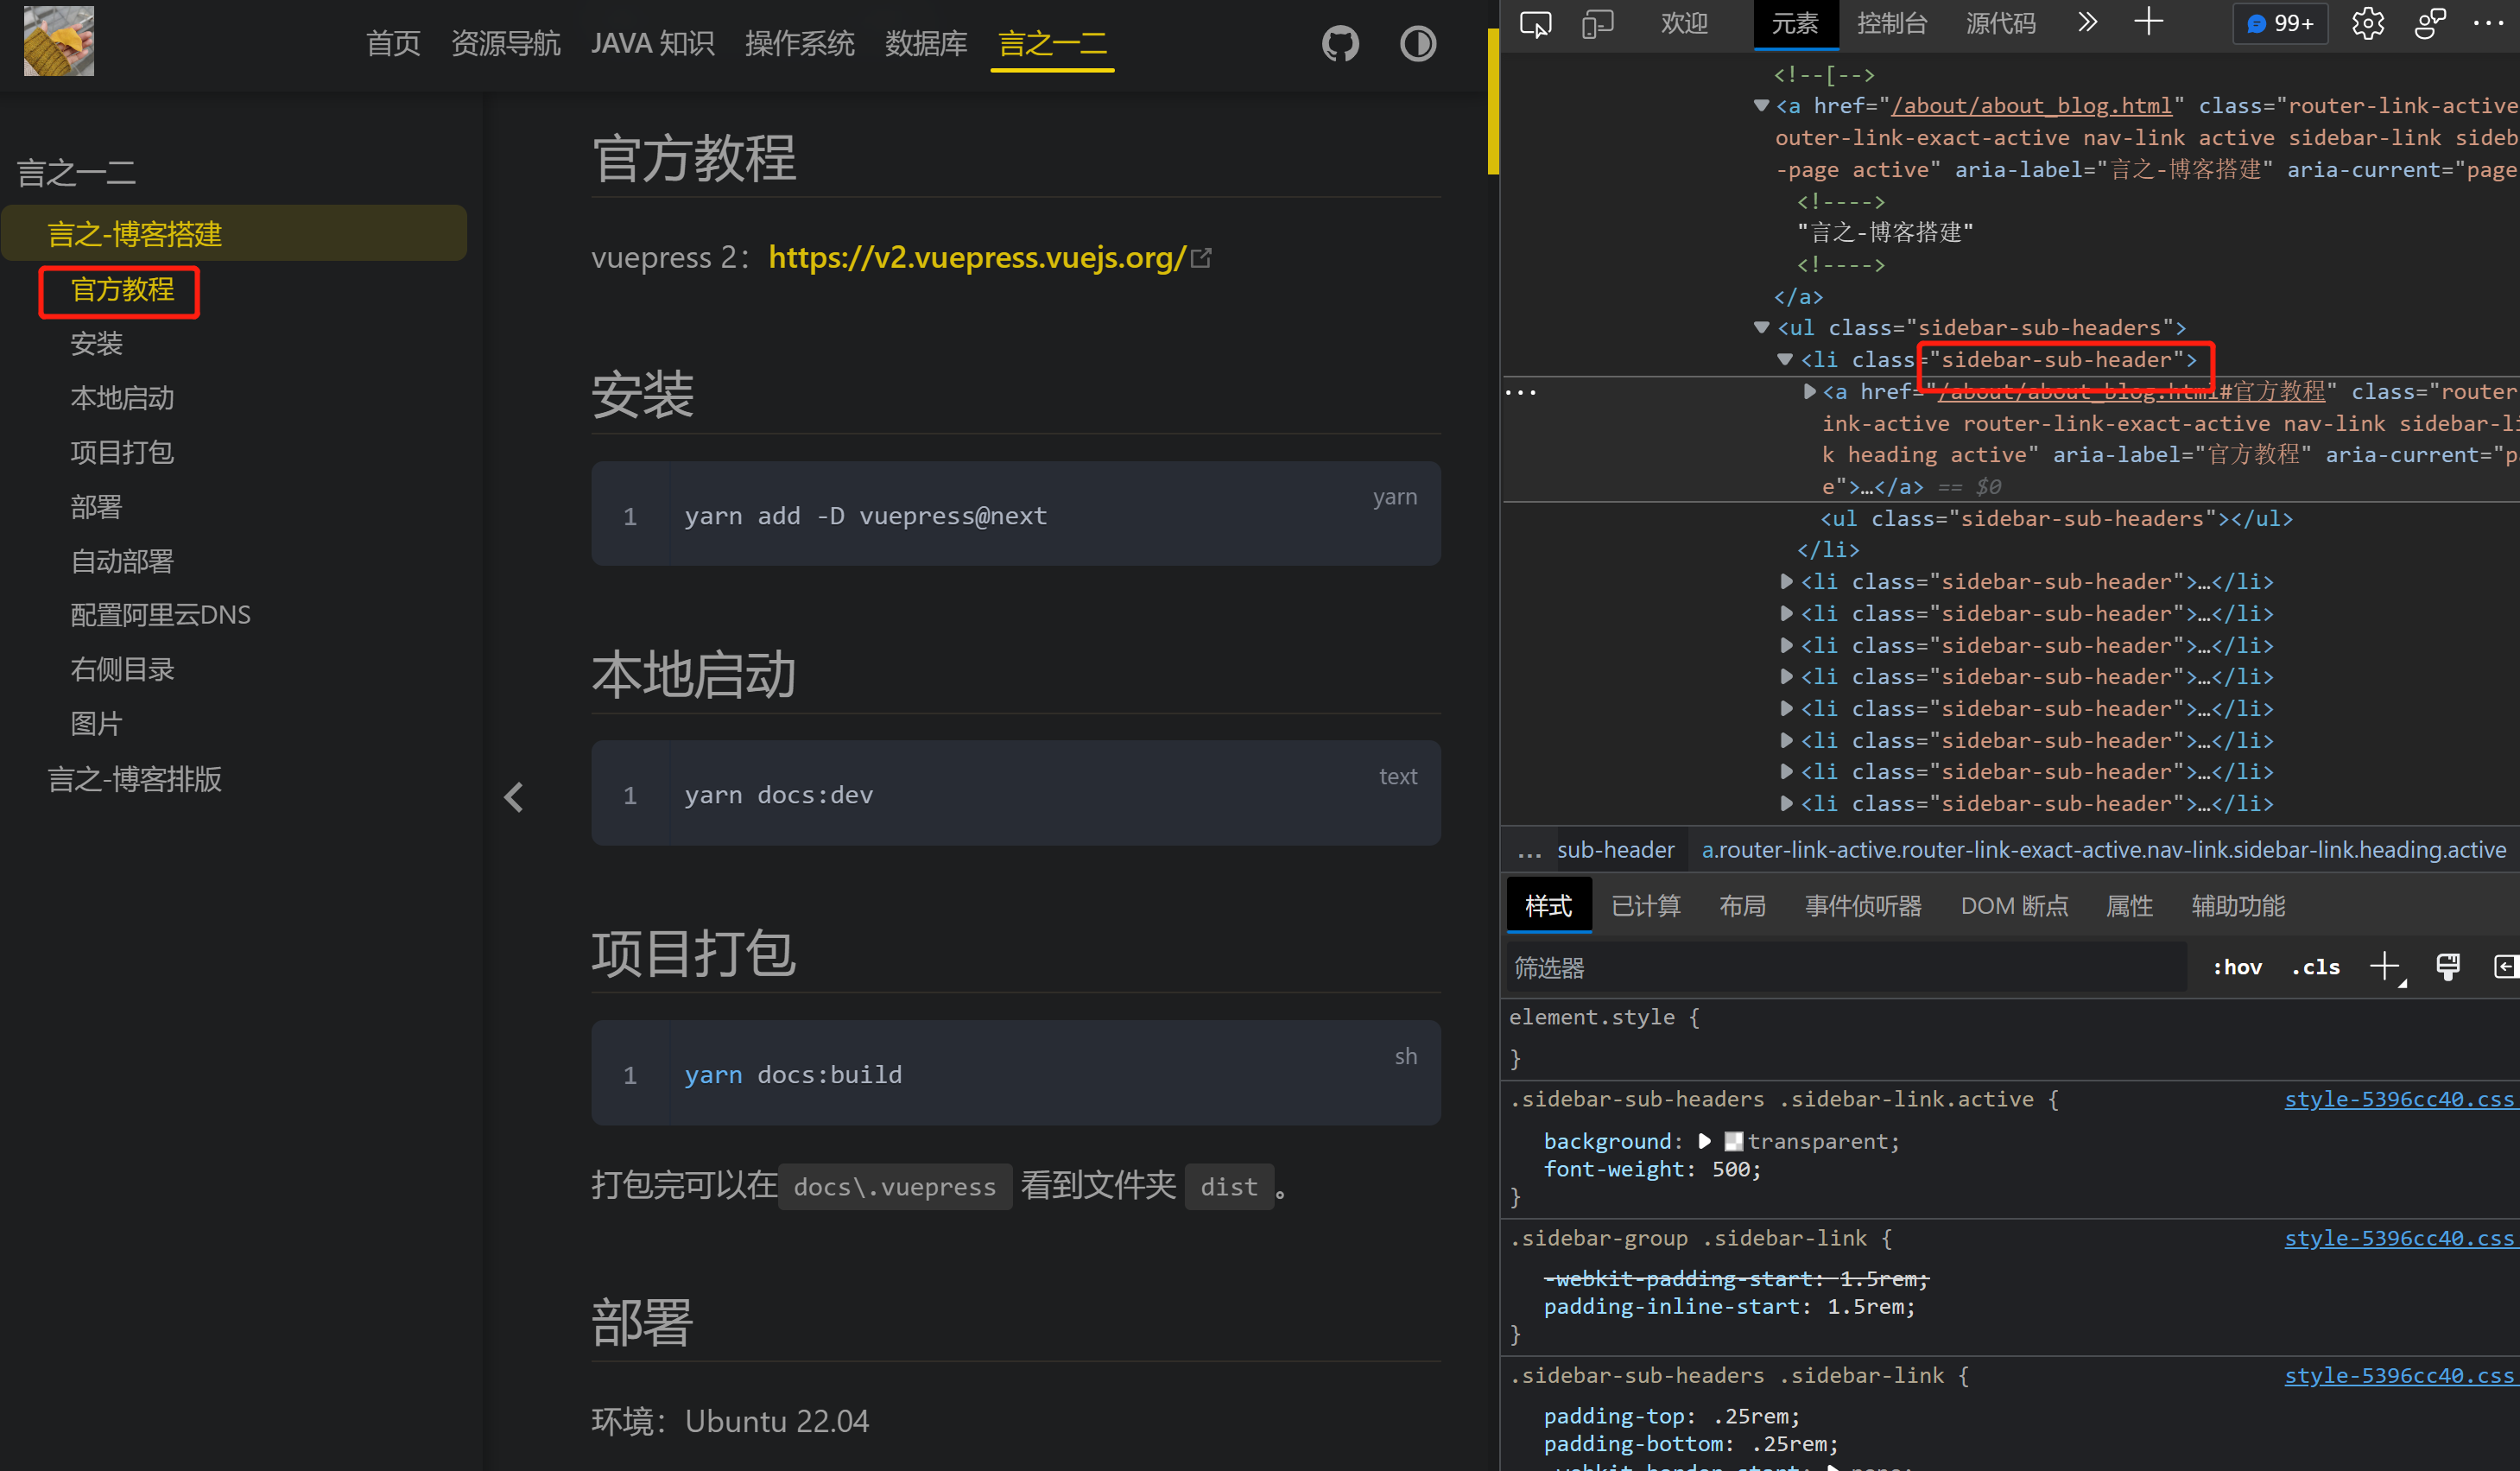
在官网上只找到 sidebar 开关或者设置 headerDepth,但前者是关闭侧边栏,后者是控制目录层深,无法解决问题。
于是 F12,大屏电脑,右侧是 toc:
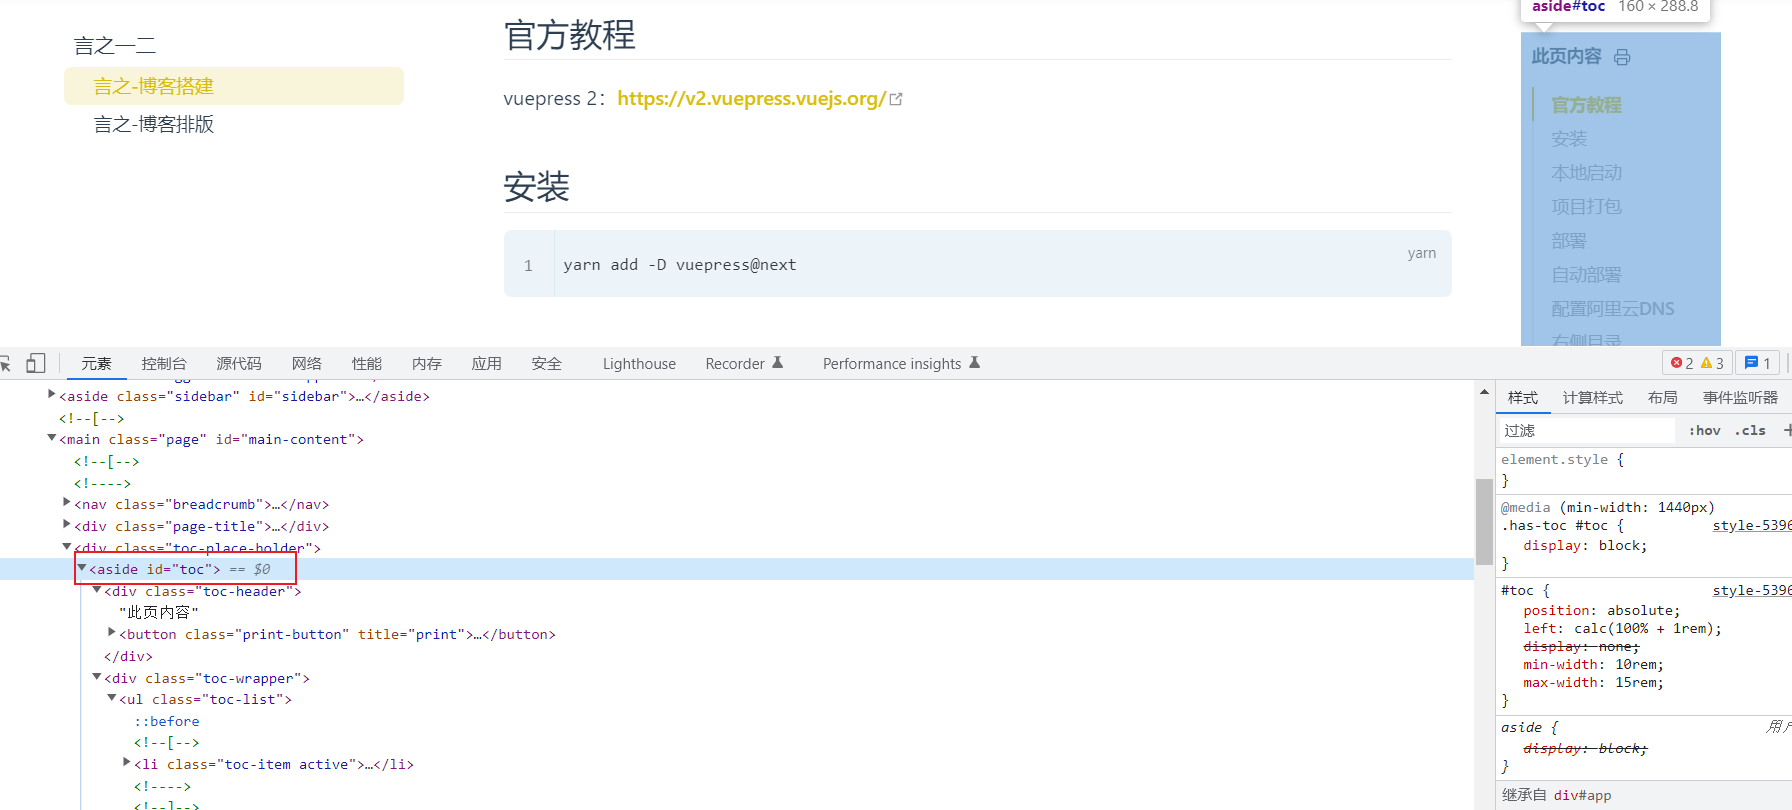
用上面的 toc-list 去 node_modules 目录下搜索,最后找到了 renderChildren:
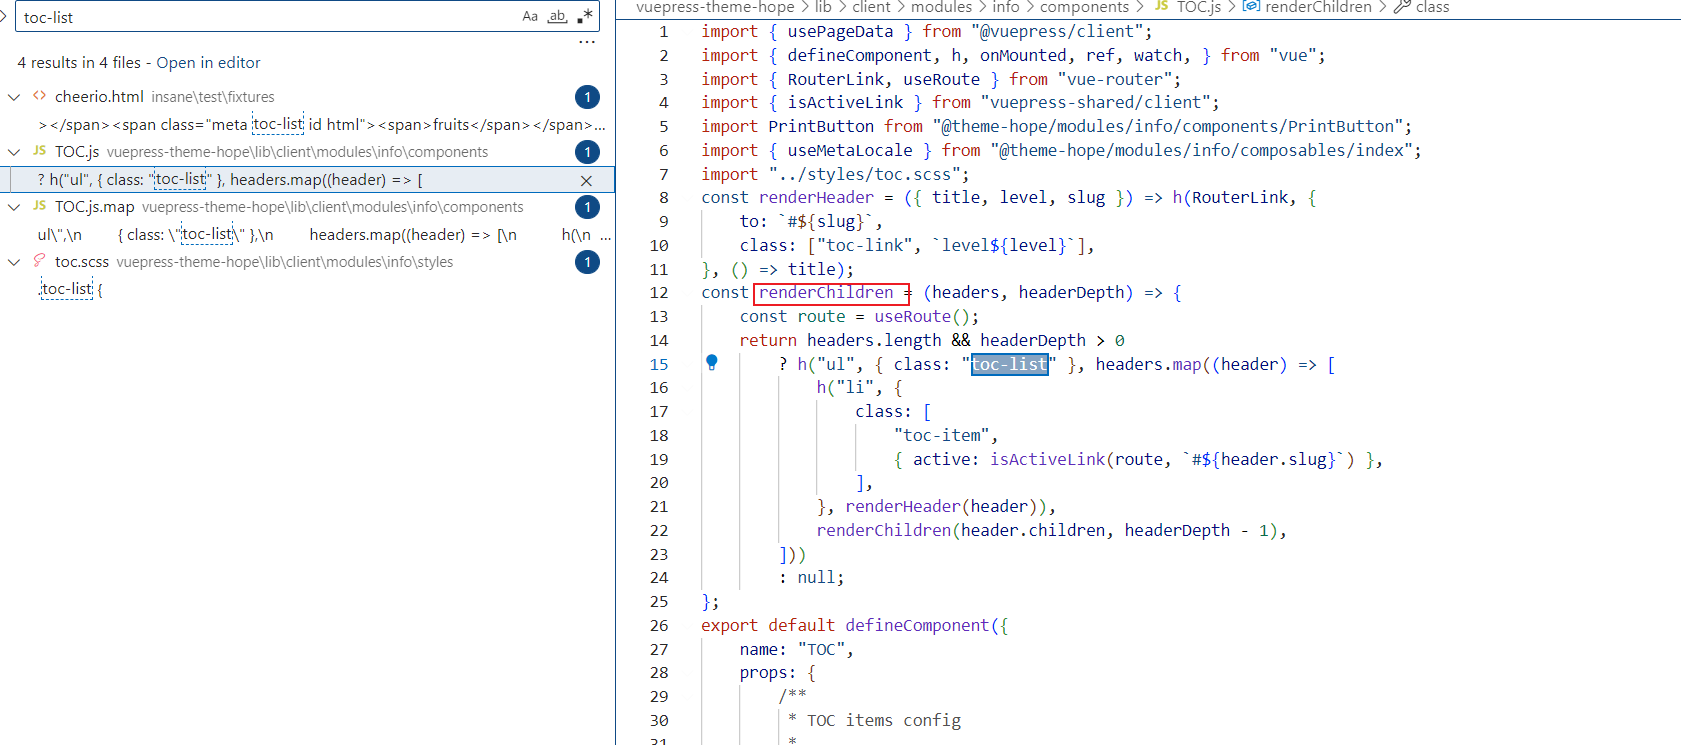
再用 renderChildren,找到了生成 html 里 toc-list 的地方:
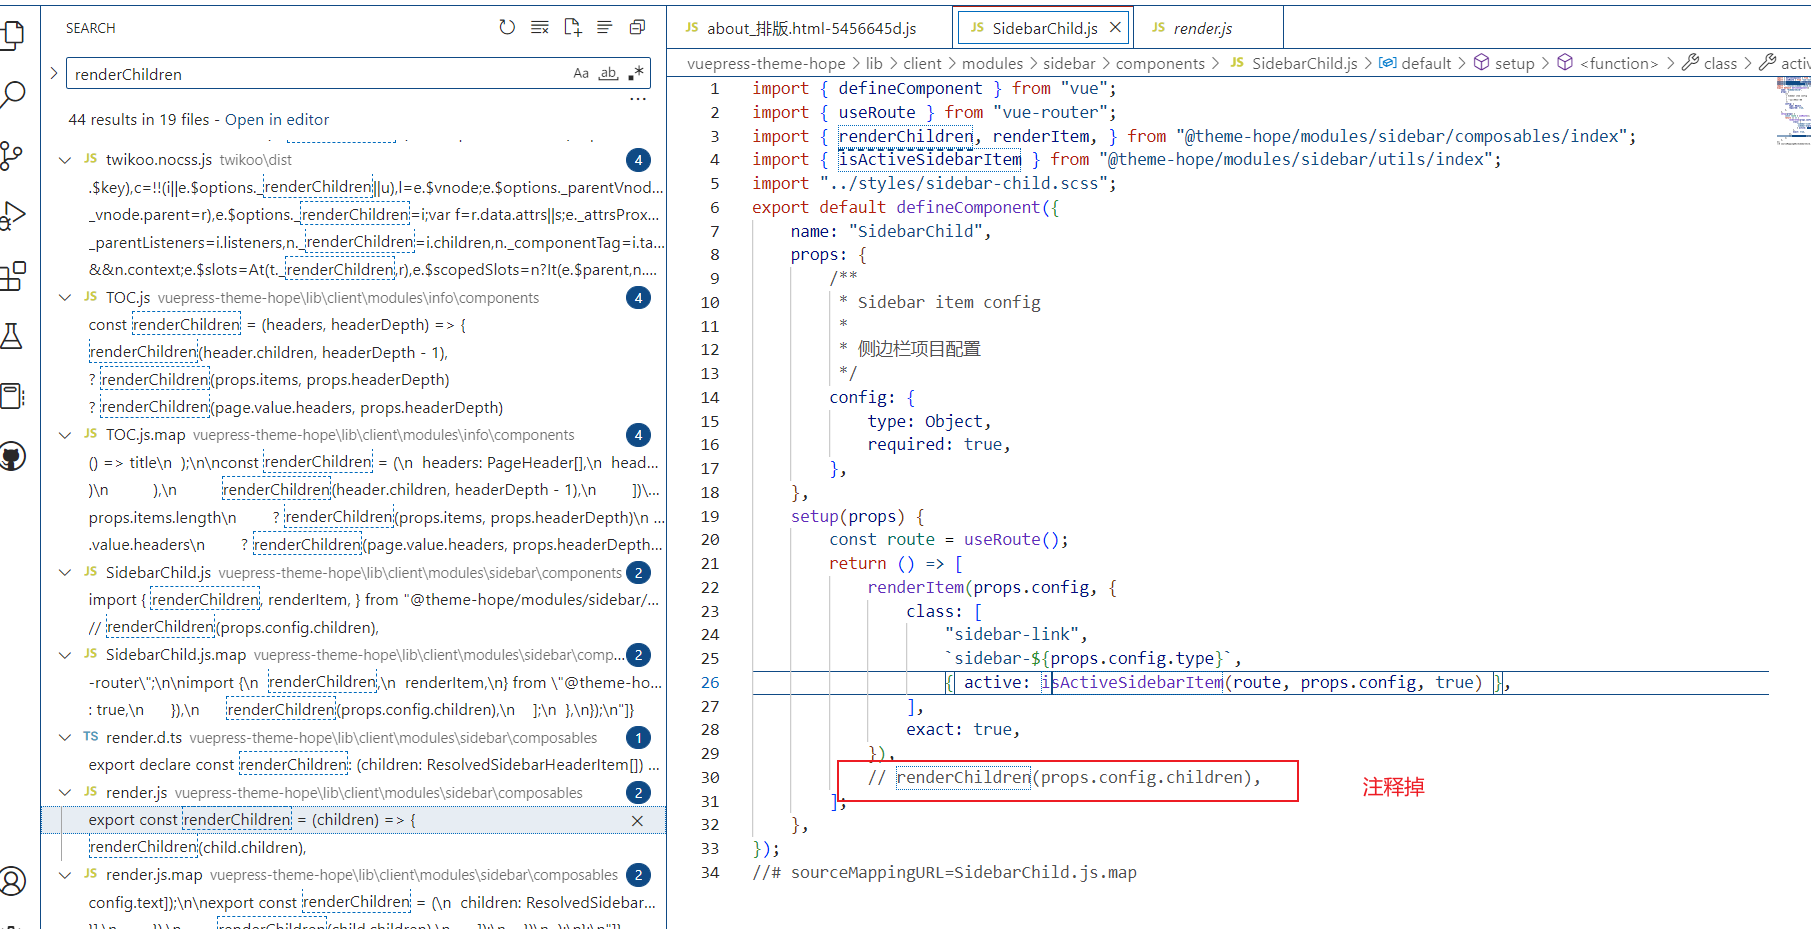
注释掉上面试了一下,的确是这个位置无误。
那如何达到我的小屏幕电脑,目录也在右侧显示的目的呢?
我们可以发现,小屏电脑左侧标签是 sidebar-sub-header。
打开生成的 dist 下生成的 html 文件,发现 sidebar-sub-header 与 toc-list 标签皆存在。所以很大可能就是因为 css 根据不同屏幕对其的控制了。
在 node_modules 下搜索 toc-list,果然找到了 toc.scss 文件:
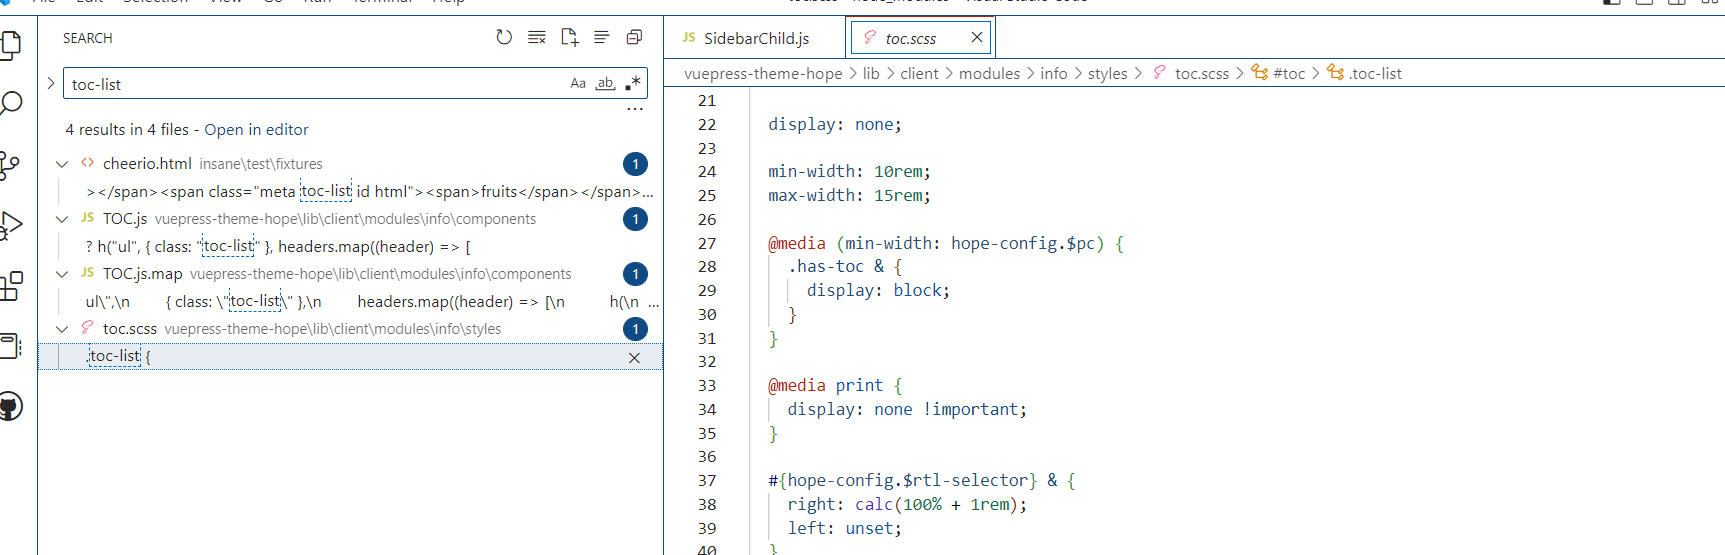
  @media (min-width: hope-config.$pc) {
    .has-toc & {
      display: block;
    }
  }
上面的意思是媒体尺寸大于
hope-config.$pc时,以block格式显示。
再搜索 sidebar-sub-header,可以看到这里控制着当右侧目录显示时,就不显示 sidebar-sub-header。
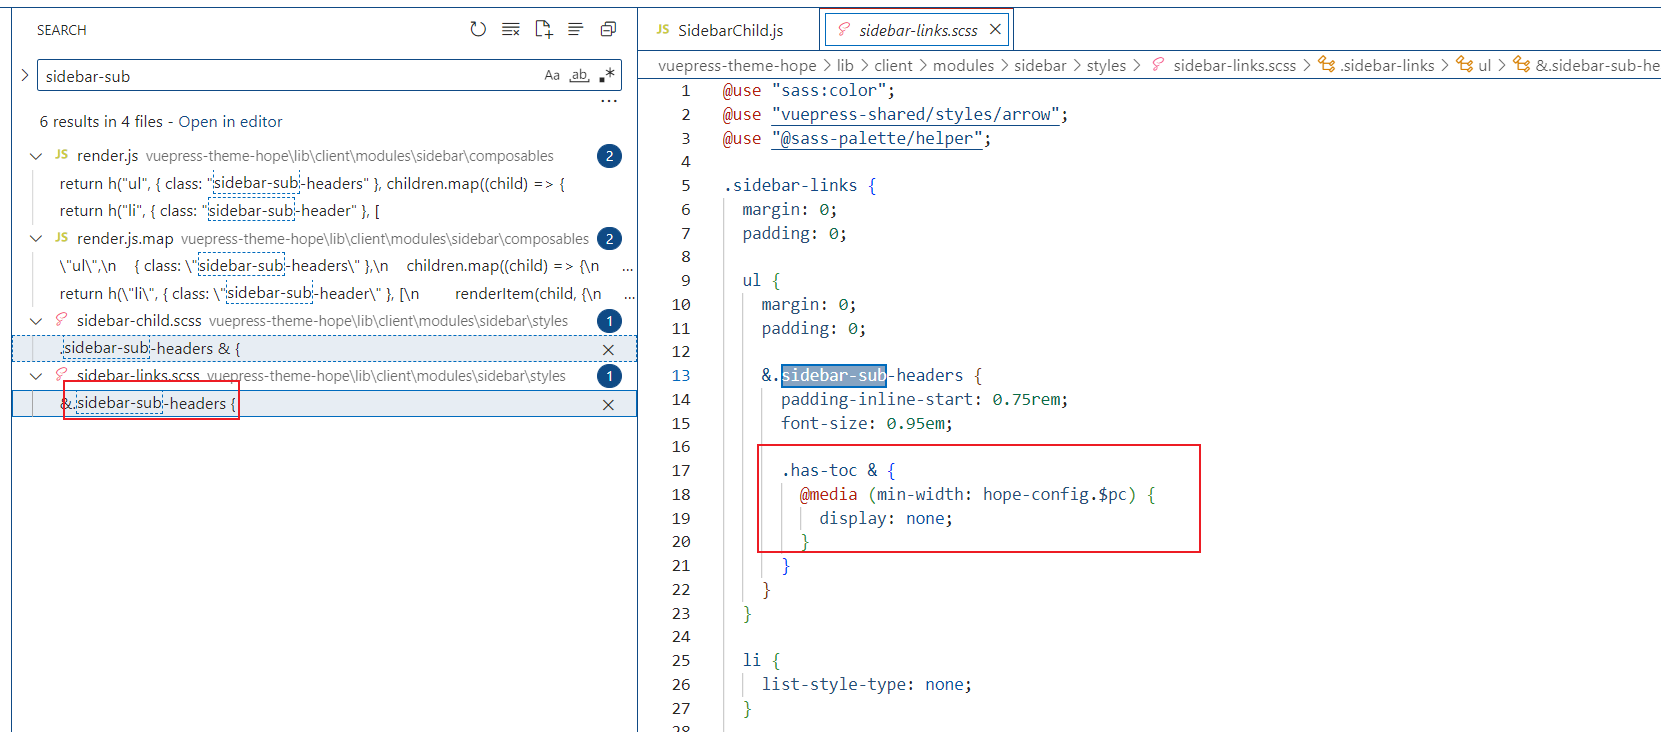
那么 hope-config.$pc 又是啥?
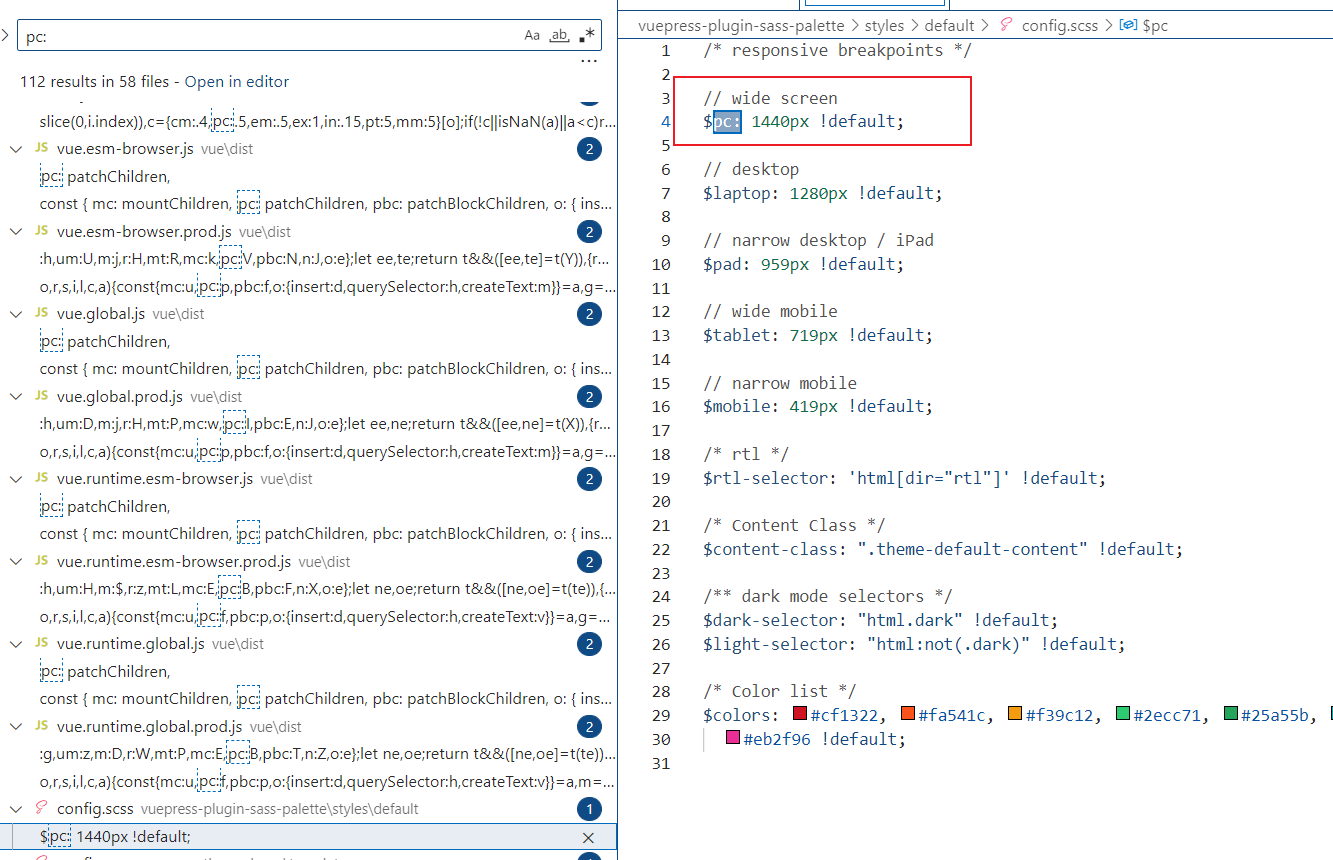
至此就很明晰了,小屏电脑都在左侧是因为它的尺寸小于 1440px,而大屏电脑则大于这个数值。
设置
最终在 src\.vuepress\styles\index.scss 设置如下:
// place your custom styles here
// desktop
$laptop: 1280px ;
#toc {


    @media (min-width: $laptop) {
      .has-toc & {
        display: block;
      }
    }

    @media print {
      display: none !important;
    }
}

.sidebar-links {
    ul {

      &.sidebar-sub-headers {

        .has-toc & {
          @media (min-width: $laptop) {
            display: none;
          }
        }
      }
    }
}

.sidebar {
    @media (min-width: $laptop) {
        box-shadow: none;
      }
}

.theme-container {

    &.has-toc .page.blog {
      @media (min-width: $laptop) {
        // fix toc padding
        padding-inline-end: 0;
      }
    }
}

.toggle-sidebar-wrapper {

    @media (min-width: $laptop) {
      display: none;
    }
}

.theme-container {

    .page {


      @media (min-width: $laptop) {
        padding-inline-end: calc(
          100vw - var(--content-width) - var(--sidebar-space) - 6rem
        );
      }
    }
  // sidebar is disabled
    &.no-sidebar {

        &.has-toc {
        .page {
            // add padding for anchor
            @media (min-width: $laptop) {
            padding-inline-end: 16rem;
            }
        }
        }
    }
}
自定义
如果想自己生成右侧目录,可以参考这个链接:为 vuepress 站点添加侧边导航栏 。
图片
适用 vuepress2
修改 docs/.vuepress/config.ts 配置文件
- 设置 head 属性,添加 link 标签,href 设置图片路径。
- 注意:图片放在 docs/.vuepress/public 文件夹下,public 要手动创建。
- 编译后 dist 文件夹会将 public 文件夹下的文件放出。
import { defaultTheme } from 'vuepress';
import vuepressPluginAnchorRight from 'vuepress-plugin-anchor-right';


export default {

  plugins: [
    [vuepressPluginAnchorRight()],
  ],
  lang: 'zh-CN',
  title: '秋迟先生',
  description: '有趣的知识库',
  head: [[
    // 设置 favor.ico,.vuepress/public 下
        'link', { rel: 'icon', href: '/images/avatar.jpg' }]
  ],
  theme: defaultTheme({
    // 默认主题配置
    logo: '/images/avatar.jpg',
    ...
  }),
}